Creating JAR file using JDEVELOPER 12C
This article will educate you about the JAR file generation using JDEVELOPER 12C. To create JAR file we have to first create Java file and the compile it. Once ".class" file created from ".java" then our class file is eligible to be part of JAR file
Click on Next
Go to Jdeveloper --> Create New --> Application -->Custom Application --> JARGeneration
Provide project name as "JARGenerationPRJ". Click on Next and Finish.
Once Project is created lets create one Sample Java File , For that first Right click on JARGenerationPRJ click on Gallery and Select Java and then Class
Provide Name as ConcatenatedString & Package as conacatenatedpkg and Click on OK
Java file will be generated
Now we will add our code to concatenate two strings , for that i will write below method and then rebuild it
public static String ConcatString(String Input1,String Input2)
{
return "JAVA CAllout Assignment"+Input1+"and"+Input2;
}
}
Our JAVA file is create , now next step is to generate JAR file. To generate JAR file , first we need to create deployment profiles , Follow below screenshot to create deployment profile to generate JAR files
Select JAR file in profile Type and provide deployment profile Name
Click Ok and then Click Browse on Main Class
Select Class name from Hierarch and click ok to generate the JAR file
Now go to Application and Click on Deploy and select the newly created deployment profile "ConcatenatedJAR"
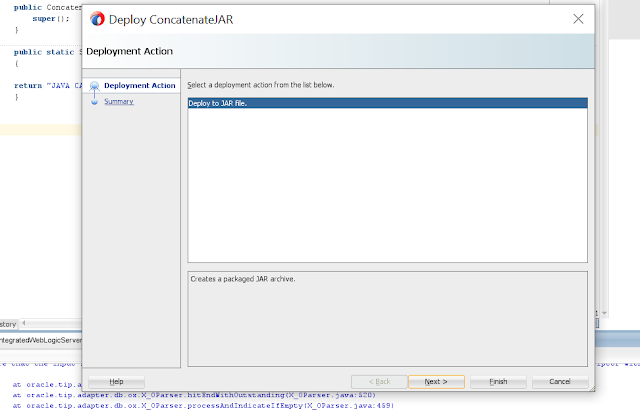
Click on Deploy to JAR file and then click ok
JAR file will be generated in the mentioned Path
Now lets go to the path and verify


Comments
Post a Comment